Featured

Dad’s BBQ Spice Rub

SO HERE IT IS !!!

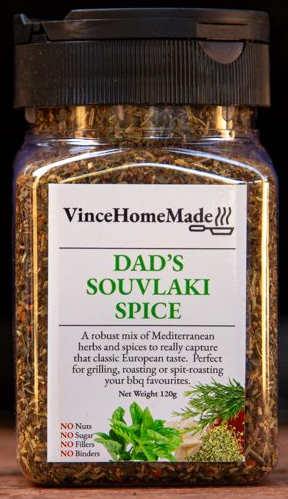
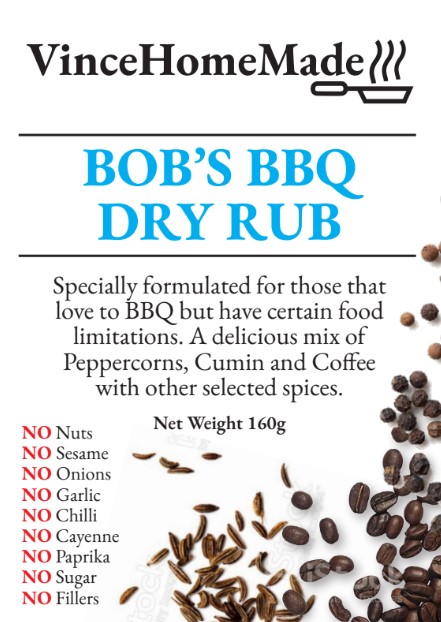
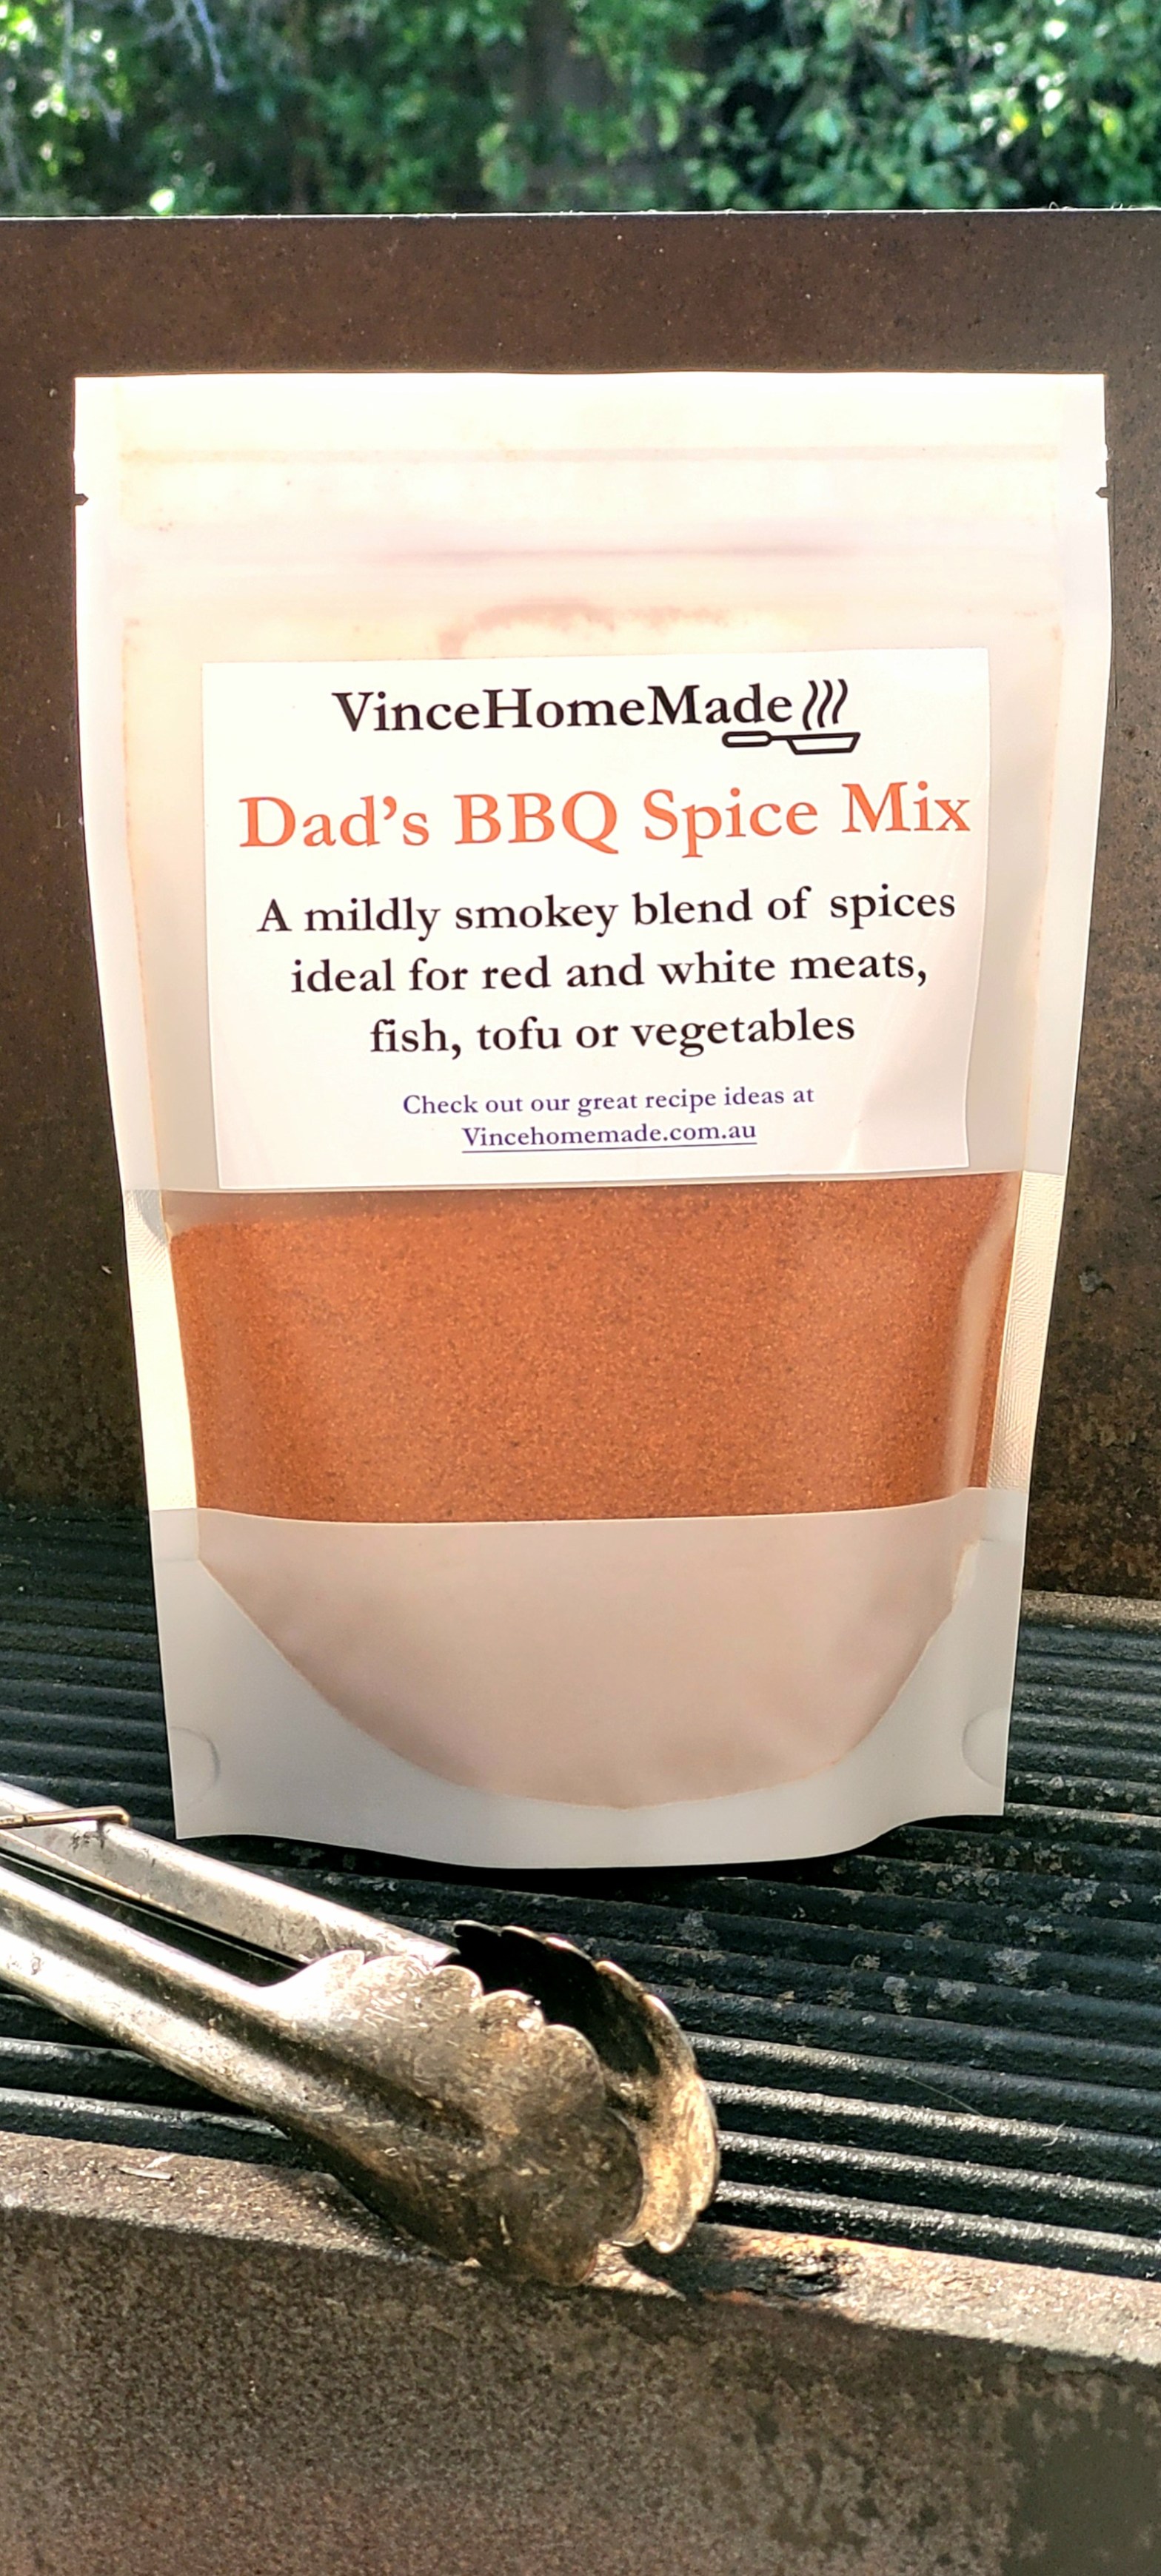
After a few years of checking and re-checking the recipe, asking friends and family to try it again and again, my Dad’s BBQ Spice Rub is now finally available for everyone.

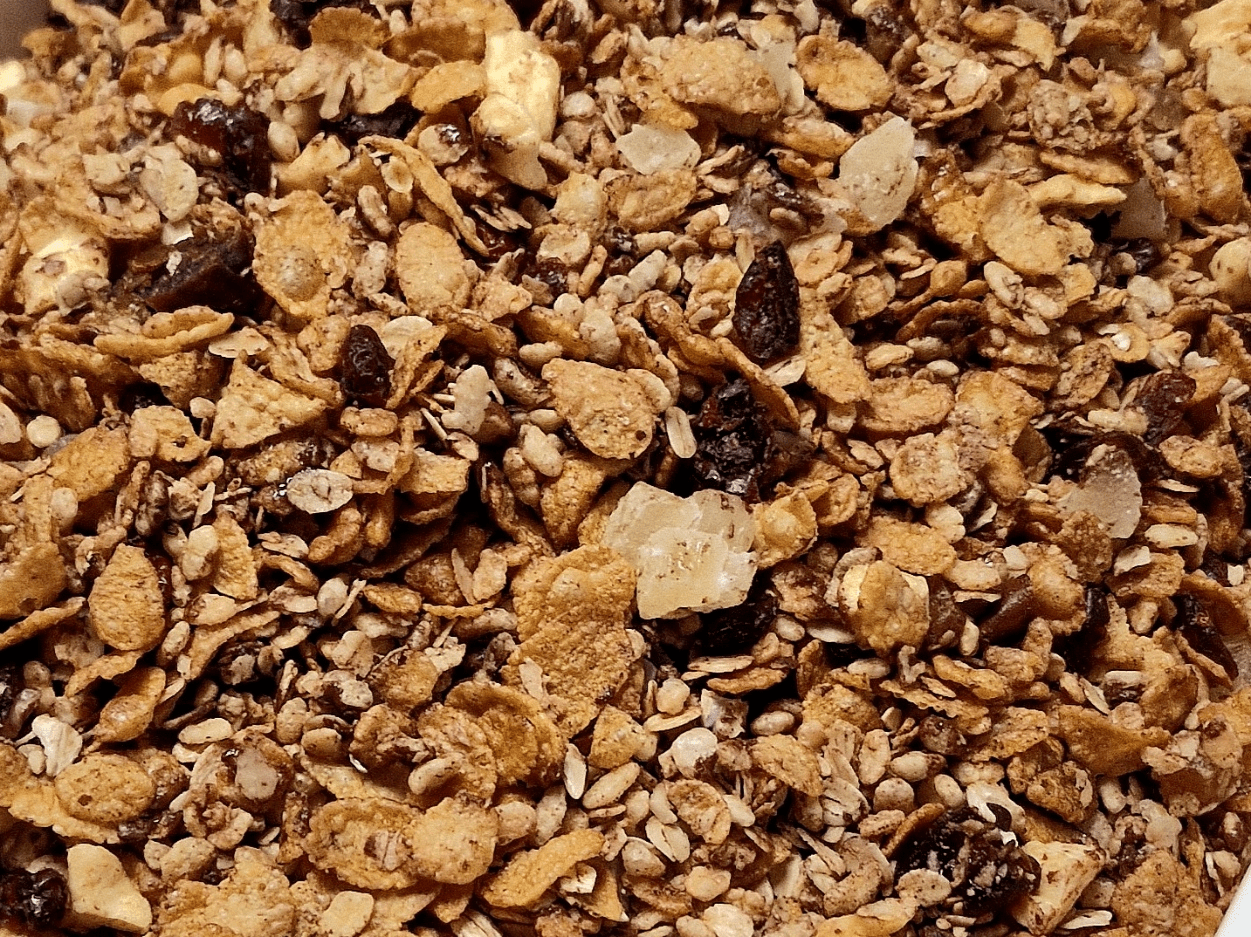
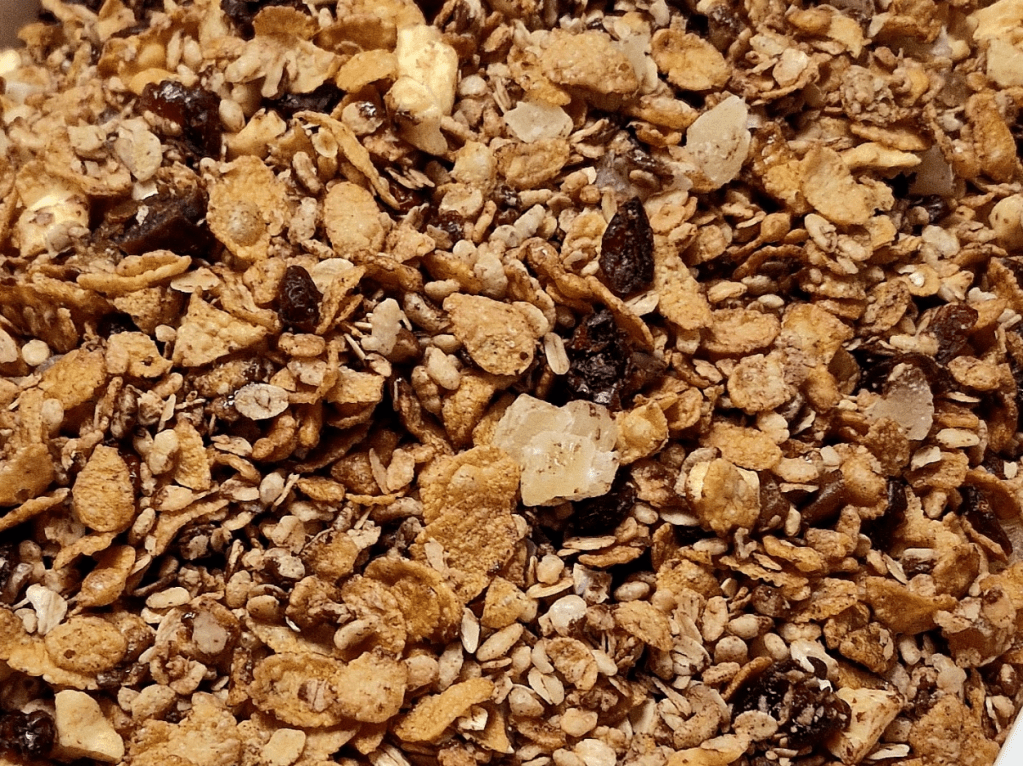
This Vegan-friendly mix is ideal for cooking with all the major proteins. Whether you are spit-roasting a whole chicken, slow-smoking a brisket, grilling prawns or stir-frying tofu. The mix does really well with rice and vegetables too.

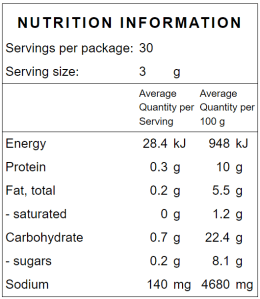
The recipe is also Nut and Sesame-seed free, as well as virtually Gluten-free* and has no fillers or binding agents, like rice flour, sugar or excessive salt (less than 5%)

Carefully and skilfully blended here in Melbourne by a commercial blending company to my exact recipe, I will then be packing and shipping directly to you.

Starting price is just $12.50 Australian plus shipping for 160grams, in a sprinkle cap recyclable jar.

The link to the store is below and is securely powered by Square.

http://vincehomemade.square.site

AND Yes I will be shipping worldwide.

There are options on the page for major currencies other than AUD and delivery.

If you have any difficulty ordering on the page or want to know more, send me a direct message and I will get back to you!

*May contain traces of Gluten and Sulphates from the manufacturing process.

#𝑫𝒂𝒅𝒔𝑩𝒃𝒒𝑺𝒑𝒊𝒄𝒆𝑹𝒖𝒃

Featured

How to make vertical format video in Adobe Premiere Elements

I have struggled for a long time to get vertical format video in Premiere Elements, so I can edit.

As all of us now record and play vids on our phones, to then make Instagram reels, Facebook, Youtube, Tictoc or whatever, this will really help up my game and maybe yours too.

Note that I am in no way associated with the maker of this vid, but Ish, the creator, tells you in clear steps how to do it and I am very grateful I found it !

Rosemary and Garlic Focaccia

A great tasting and fairly easy bread to make, ideal for sharing. Perfect as a starter with dips, as a side to a warming winter soup, or a summer salad garnish.

Recipe

Prep time 15 minutes, plus 2 hours to rest/prove, cooking time 30 minutes

Ingredients

425 g Plain flour

260 ml Water

90 ml Olive oil, plus extra for greasing the baking tin

3 – 4 sprigs fresh Rosemary, or about 15 g dried Rosemary

2 – 3 cloves of Garlic

10 g Cooking Salt

5 g Dried Yeast

1/2 teaspoon Ground Black Pepper

Salt flakes for garnish

Method

  • Stir the yeast into the water and allow to reactivate for 5 minutes
  • Peel and crush the garlic
  • Wash and pick the Rosemary, then reserving about a 1/4 the garnish, chop the remainder
  • In a large bowl add the Flour, the chopped Rosemary, Garlic, Cooking Salt, Black Pepper and 30 ml of the oil
  • Add the Yeasty water to the Flour mix and work into a dough.
  • Put the dough onto the work surface and knead and stretch for 5 minutes until smooth and elastic.
    • Do not add any extra flour, the dough is sticky but will come together as you knead.
    • Can be done in a mixer at slow speed using dough hook
  • Once the dough is ready, place back in the bowl and cover with cling wrap. Place in a warm, dark place for an hour or until dough doubles in volume.
  • Remove dough from bowl and lightly stretch, then allow to rest for 5 -10 minutes.
  • Prepare the baking tray with an even coating of olive oil, transfer the dough and stretch and level to fill the tray. Allow to rest for at least 30 minutes covered with a clean tea towel
  • Preheat the oven to 200o Celsius
  • Scatter the dough with the reserved Rosemary sprigs and salt flakes, then make multiple deep dimples using fingertips. Drizzle the remaining 60 ml of olive oil evenly over the top
  • Bake in the oven for 20 minutes until evenly browned, then cool on a wire rack.

Notes

When I make this bread, it is usually all eaten same day, but should be stored in an ait tight container at room temperature if you have any left over.

You can mix up other flavours too. Try using other herbs such as Sage, Oregano or Thyme being all good options. You may want to add chopped Sundried Tomatoes, Roasted Capsicum or even Feta Cheese to the mix too.

    Dad’s Souvlaki Mix

    The Mediterranean Classic

    Fire up the coals, get the kebab sticks out and get cooking with this robust mix of Mediterranean herbs and spices to really capture that classic European taste.

    Perfect for a precook marinade, or for you to sprinkle on as you grill, roast or spit-roast your BBQ favourites.

    I have also heard several people tell me how they love it mixed into their pasta sauces, sprinkled on roast potatoes, hot potato chips with extra sea salt and crumbled feta or added as a garnish to pizzas before cooking.

    Dad’s Souvlaki is becoming my most popular and once you taste it you will know why. This is approved by my Greek in-laws and many friends and customers, please check out the recipe links and gallery of images from happy Dad’s Spice Mix cooks in Instagram.

    #Dadssouvlakispice


    Buy it now
    Dad’s Souvlaki Spice – Square shop

    12% sea salt

    Nut-Free Maple Granola

    A colourful Granola mixture with rolled oats, puffed rice, dates, sultanas, apples, cranberries, glace cherries & stem ginger, spiced with cinnamon and sweetened with Canadian maple syrup and Vegan dark chocolate chips.

    Ingredients

    1000g Rolled Oats

    700g Corn Flakes

    450g Puffed rice

    250ml Extra Virgin Olive oil

    250ml Maple syrup

    250g Sultanas

    200g Uncrystallised Ginger, coarse chop

    200g Dates, cut in quarters

    200g Dried Cranberries

    200g Dried Pineapple chunks

    200g Dried Apple, coarse chop

    200g Glace cherries, cut in half

    200g Dark Chocolate, 70% cocoa mass or better, chopped into small pieces or use small choc chips. A Good Vegan chocolate is a great here

    30g Cinnamon, ground

    Method

    • Preheat the oven to 170 degrees Celsius, and line 2 large baking trays with greaseproof baking paper
    • Chop all the fruit as per the ingredients list, combine with the chocolate, put to one side.
    • Mix the Oats, Puffed Rice, Corn Flakes, chopped Ginger and Cinnamon in a large bowl
    • Add the Maple Syrup and Oil and stir gently to coat. then spread some on to each of the four trays to a depth of no more than 2 cm
    • Put the trays in the oven and bake for 10 minutes, stir the granola mix and bake for 10 minutes more.
    • Once baked, add a couple of handfuls of the dried fruit and chocolate mix and stir into the tray. The heat will melt the chocolate so stir again after 5 minutes.
    • Allow to cool completely in the tray, then transfer to a large container.
    • Repeat the last three steps until all the mix is baked, mixed and cooled.
    • Ensure the whole batch of multiple trays is evenly mixed.
    • Can be stored in an airtight container for a couple of weeks, or if stored in a vac- seal bag up to 6 months.

    Saving this to my blog as I can never find the recipe on my phone files!

    Notes

    Adding other dried fruit is good but be mindful that banana chips or dried coconut can overpower the other flavours. Mango and Papaya are very sweet so only use 100g of either. Other options include apricot, pear, strawberry, Gogi berries depending on personal taste.

    Honey can be used instead of maple syrup if preferred, but will be sweeter tasting, and at risk of burning in the oven.

    When chopping the fruit, make the pieces all about the same size, being 1cm or smaller, so that each spoonful is not just one thing.

    Save time when making by having multiple trays and cook 2 at a time, while 2 cool down.

    Bob’s BBQ Dry Rub

    I was on a training course a few years ago and met Dawn from South Australia, who was interested in my BBQ spice mix. Her husband, Bob, who has a love of barbeque, wanted more than just salt and pepper to season his steaks, but has a number of limitations in his diet.

    As per Bob’s request, the blend contains no Garlic, no Onion, no Chilli, no Cayenne and no Paprika. Instead, it is a Coffee and Cumin rich blend with notes of Jamaican Pimento.

    Packing big flavour, this is great on steaks and anything ‘low and slow’ smoked.

    Like all my spice mixes, Bob’s BBQ Dry Rub contains no nuts, sesame seeds or animal products. There are no added colours, fillers, or sugars, and less than 8% salt. Traces of sulphates may be present from the manufacturing processes.

    Carefully and skilfully blended here in Melbourne by a commercial blending company to my exact recipe, I will then be packing and shipping directly to you.

    Starting price is just $12.50 Australian plus shipping for 160grams, in a sprinkle cap recyclable jar.

    The link to the store is below and is securely powered by Square.

    http://vincehomemade.square.site

    AND Yes I will be shipping worldwide.

    There are options on the page for major currencies other than AUD and delivery.

    If you have any difficulty ordering on the page or want to know more, send me a direct message and I will get back to you!

    #BobsBBQDryRub

    Commercial Chicken

    A recipe for the BBQ that is quick and easy, but will make you a grill Star! Check out the Instagram video below cooking ‘drummies’ on the grill.

    The all-important Dads BBQ Spice Mix is available worldwide from my online store, A great BBQ recipe for chicken pieces, especially wings or drumsticks.

    Marinade

    • 4 Tablespoons Tomato ketchup/sauce
    • 3 Tablespoons Maple Syrup
    • 2 Tablespoons Apple Cider Vinegar
    • 1 Tablespoon Dad’s BBQ Spice Mix (available from my store)
    • 1 teaspoon Oregano
    • ½ teaspoon salt
    • 2 kg Chicken wings or drumsticks
    1. Measure and add all the ingredients for the marinade in the bowl.
    2. Add the 2 kg Chicken wings or drumsticks and mix well.I prefer a gloved hand to do this as more effective than a spoon.
    3. Allow the flavours and acids to marinade the meat for at least 30 minutes
    4. Remove the chicken from the marinade and onto a hot grill or bbq. Turn and baste with any remaining marinade part-way through.
    5. Cook until the internal temperature reaches at least 75℃ using the thermometer

    This is called Commercial Chicken by my youngest as he believes it is so good it should be in a commercial!

    I usually make a double batch of the marinade and layer it on thick with a few bastings while cooking. If you can cook in a charcoal BBQ the flavour is incredible, I love to use my spit roaster with the chicken in a flat basket. If you have neither, it still comes out great in the regular oven too.

    Tsoureki – Greek Easter Bread

    It’s coming up to Easter, and Greek Easter too, which for me means baking this amazing-smelling, super tasty, light and delicious bread.

    The recipe is loosely based on a couple I found elsewhere many moons ago, but I have amended the ingredients slightly to improve that orangey spicy smell and deliver a softer and slightly sweeter crumb.

    Below is a short TikToK I made of how to make this yummy bread showing a bit of the kneading, how I prove the dough, and the all-important plating. I recommend plating from the middle as this will help if you wish to make into a ring. If kept as a straight loaf it lets you can tidy the ends neatly by tucking under.

    Happy Baking !

    @vincehomemade

    Making Tsoureki – traditional Greek Easter Bread A practice bake for Greek Easter. I will be posting the recipe and videos to my website, and would welcome comments there too. #linkinbio #tsoureki #Easter #GreekEaster #bread #breadmaking #baker #homebaker #special #specialbread #vincehomemade #cookingwithstyle #cookingwithtaste #desirabledelicacies

    ♬ original sound – Vince Home made

    Ingredients

    • 35 g unsalted butter at room temperature (4.7 oz.)
    • 135 g milk at room temperature(4.7 oz.)
    • 200 g sugar 7 oz.
    • 4 medium eggs at room temperature
    • 870 g bread flour 30 oz.
    • 21 g dry yeast 0.7 oz.
    • 100 g lukewarm water 3.5 0z.
    • 1 large Orange – zest and juice
    • 3 g ground mastic 0.11 oz.
    • 4 g ground mahlepi 0.14 oz.

    Glaze

    • 1 egg
    • 1 tbsp water

    Method

    1. Combine the lukewarm water, a pinch of sugar and yeast and stir. Set
      aside for about 6-7 minutes, until the yeast rises and starts bubbling
    2. Use a pestle or a blender to ground the masticha and mahlepi, along
      with a pinch of sugar and set aside.
      These aromatic spices will give Greek Easter bread its distinctive taste
      and amazing smell. But be careful not to add any more mastic than
      this tsoureki recipe calls for, as it will leave a slightly bitter taste to
      your Greek Easter bread.
    3. In a saucepan add the butter, sugar and milk. Place over very low heat
      and stir until the butter melts and the sugar dissolved. The key is to
      melt the butter at very low heat, so that the temperature doesn’t ‘kill’
      the yeast. Remove the pan from the stove and check the temperature.
      The mixture should be at the same temperature as your finger. If it is
      warmer, leave to cool down for a few minutes and check again.
    4. Pour the butter mixture in a large bowl and whisk in the eggs. Add
      the yeast mixture and whisk to combine.
    5. Add the flour, the ground mastic and mahlepi, orange zest and the
      butter-egg-yeast mixture from step 4 all into the mixer. Using the
      dough hook, mix at first at low speed, until the ingredients start to
      combine and then mix at medium-high speed for about 15 minutes,
      until the dough doesn’t stick on the sides of the bowl. At this point
      the dough should be really soft and a little sticky. (Be careful not to
      add any more flour than this tsoureki recipe calls for, as the dough
      should be really soft and not firm).
    6. Cover the dough with plastic wrap and place in a warm environment,
      until at least it doubles in size (for about 2-3 hours).
    7. Gently deflate the tsoureki dough with your hands and cut in 6 equal
      portions (three for each Greek Easter bread). Take one piece of the
      dough (do not flour the working surface!) and roll it a little bit with
      your hands. Hold with your hands from the edges and shake to
      stretch the dough into a rope. This technique will help the Greek
      Easter bread (tsoureki) form the characteristic stringy texture, as seen
      in the picture. Form the Greek Easter bread into a braid and transfer
      on a large baking tray layered with parchment paper. Repeat the
      same procedure with the second tsoureki. Let the Greek Easter bread
      rise for about 1 more hour at room temperature, until it almost
      doubles in size.
    8. For the glaze, combine the egg and 1 tbsp water and whisk with a
      fork. Brush the top of each Greek Easter bread with the egg, being careful not to deflate it,
    9. Bake in preheated oven at 160C for about 30-40 minutes, until nicely browned and fluffy.
    10. Let the Greek Easter bread cool down and wrap well with plastic wrap, so that it doesn’t become hard and dry. Store for up to 5-7 days at room temperature.

    Notes

    This is a nut free version of the traditional recipe, as we are a nut free home. The classic version has flaked almonds sprinkled on top of the glaze just before putting in the oven.

    There are also some very yummy chocolate versions out there which look amazing, and I have seen dried fruit versions too.

    Dark Chocolate Brownies with White and Dark Chocolate Chips

    Dark Chocolate Brownies with White and Dark Chocolate Chips

    Dark Chocolate Brownies with White and Dark Chocolate Chips

    Equipment

    • 20cm x 20cm deep baking pan
    • Greaseproof or baking paper
    • Mixing bowl
    • Scraper / spatula
    • Whisk
    • Stand mixer

    Ingredients

    • 225 g Chocolate, Dark block
    • 100 g unsalted butter
    • 120 g brown sugar
    • 3 large eggs
    • 120 g sugar
    • 80 g plain flour
    • 5 ml Natural Vanilla Extract
    • 2 g salt
    • 50 g Chocolate Chips, Dark
    • 50 g Chocolate Chips, White
    • spray veg oil
    1. Preheat the oven to 175 degrees Celcius
    2. Grease the 20cm x 20cm baking pan using the spray veg oil, then line with the greaseproof paper.
    3. Place the 225 g Chocolate in a heatproof mixing bowl and place over almost simmering water. Stir it frequently until the mixture is melted and smooth. Remove the bowl from the heat and add the 100 g unsalted butter and 120 g brown sugar. Whisk until completely combined and set aside.
    4. In the other mixing bowl or in your stand mixer, add the 3 eggs, 120 g sugar, 5 ml Natural Vanilla Extract and 2 g salt. They are beaten together until thick and lighter in colour. This will take approximately 3-4 minutes
    5. Whisk the melted chocolate mix into the egg mix and then fold in the plain flour and chocolate chips.
    6. Scrape the batter into the prepared baking tin and spread evenly. bake for 25-30 minutes.
    7. Cool the brownie in the pan, then lift out using the greaseproof, slice into 16 pieces in a 4 x 4 grid and enjoy.
    • Test for doneness using a cocktail stick or skewer, but be aware the edges cook faster and may be become overdone before the middle is completely cooked.
    • For firmer brownies bake for longer, for softer gooey brownies 25 minutes will be plenty long enough.
    • Make sure you are not skewering the choc chips as they will be melted. 

    So how do these turn out? Well, I was recently asked for a Brownie recipe by Polly of @pollys_eats on Instagram and I sent her this in its draft form. I will let her tell you in her post available below.

    Gingerbread

    Gingerbread is a wonderful spicy soft biscuit made most famous by the house of the witch in Hansel and Gretel, or by the little gingerbread man running from the little old lady’s oven. Gingerbread is also commonly made for holidays such as Easter or Christmas cut to appropriate shapes and often garnished with icing, sprinkles and dried fruit.

    I have made all sorts of biscuits both professionally and at home just for family and even blogged some of them. However, I always struggled to find a good gingerbread recipe as the mix would be either too soft to roll, the biscuits too hard when baked or would not retain their cut-out shape.

    I was talking to my friend Lou of @louloucooks_ on Instagram about gingerbread, and about my problems finding a good recipe and she sent me one she had found. I subsequently amended, partly on what I had in the cupboard, and partly preference (more ginger). We each made a batch at the same time and enjoyed our respective bakes with a cuppa.

    Mixing the dough
    Mixing the dough

    I hope you enjoy this recipe as much as we have, but now I have to Run, Run as fast as I can! You can’t catch me I’m the VincehomeMade man !

    Gingerbread biscuits

    Traditional Gingerbread to make into gingerbread men or gingerbread women, with a warm spicy taste you will love.

    Biscuit dough

    • 375 g plain flour (plus extra for rolling out)
    • 5 g baking powder
    • 120 g unsalted butter (cold)
    • 3 g salt
    • 10 g dried ginger
    • 175 g brown sugar
    • 5 tbsp golden syrup
    • 1 each eggs

    Icing for decoration

    • 1 each egg white
    • 200 g Icing Sugar / Confectioners’ Sugar
    • food colouring (optional)
    • 100's and 1,000's / sprinkles (optional)
    1. Pre-heat the oven to [wprm-temperature value=”180″ unit=”C” icon=”oven-fan”]

    2. Line 3 biscuit baking trays with greaseproof paper or silicone mats

    3. Combine the plain flour, ginger, salt and baking powder in a sieve and pass through to the mixing bowl.


    4. Cube the butter and add to the flour bowl. Mix until it resembles fine breadcrumbs with no large lumps.

    5. Add the Sugar and mix then add the golden syrup and egg and mix until a dough forms.

      Putting the golden syrup in a bowl of warm water prior to weighing makes it easier to spoon out.


    6. Beat the dough briskly to make a smooth dough, then knead to form a ball.

    7. Lightly flour your worksurface and roll the dough to about 5 mm thick. Then cut out your desired shapes, please these on the baking tray.


    8. Reform your offcuts and repeat the above process until all the dough is transformed into biscuits.


    9. Bake for 10 minutes until golden, or a further minute for crisper biscuits

    10. Allow to cool completely on the tray.


    Decorating

    1. Separate the egg white from the yolk and place in a small mixing bowl

    2. Sieve the icing sugar onto the white and stir well with a spoon.

      Do not use an electric mixer as that will beat air bubbles into the mix.

    3. If you want to add colouring, stir in a drop at a time until the desired colour is reached.

    4. Pour and scrape into a piping bag and decorate the biscuits as you wish.

      If using sprinkles, 100's and 1,000s or similar use the icing to stick in place.

    5. An alternative to icing for decoration is to push small pieces of dried fruit into the raw biscuits prior to baking.  According to the traditional story, it is  " .. his eyes from two fat currants… his nose and mouth from lemon peel… and his coat from sugar…".

      They will need to be pushed in well so they stay in place so I suggest using the tip of a skewer. 

    These are best if left for a day to allow the ginger flavour to blossom fully.  If you try them while still warm they are quite bland, but after a couple of days they are really something good!

    They can be stored in a closed jar or plastic container for a couple of weeks on your countertop.  Just keep away from heat or sunlight, especially if iced and ensure the icing is fully dried before putting away.


    Biscuits
    American, Australian, British, Christmas, Classic, Indulgent, Irish, Traditional
    Biscuit, Biscuits, butter, Christmas, cookie, cookies, dessert, Easter, egg, flour, frosting, ginger, Gingerbread, oven, spice, spices, sweet, traditional

    Baked Pear and Chocolate Tart

    This recipe was one I made up on the spur of the moment and seems to be particularly popular when friends and family try it.

    Combining both fresh pears and chocolate within a handy pastry case, you can be both healthy and indulgent in one mouthful. Being made with cream means no extra is really needed either and the pastry makes this easy to cut and serve too!

    Over all it is not a difficult recipe, but requires patience as items need to cool before the next step.

    Blind baking the pastry

    This is a classic process for many types of tarts and flans. By part cooking the pastry first the delicate filling does not overcook, nor let the pastry become soggy from the wet additions.

    Once the pastry is rolled out and placed in the baking dish, ensure to gently lift and roll into the edges to remove trapped air. T

    To stop the pastry from bubbling up it is important to gently prick the base evenly with a fork to allow the cooking steam to escape. Also the use of ‘pie weights’ will press the pastry just enough to allow expansion but not too much.

    As you can see from the photo in the gallery and in the instructions, I use a combination of dried rice and dried beans as the “pie weights”. These are nearly 20 years old now and have been reused many times. I simply allow them to cool and then return to their special airtight storage jar.

    It is VERY important to line the pastry with at least one sheet, preferably two of greaseproof before adding the pie weights. Otherwise, the rice and beans will stick to the pastry and ruin the dish.

    Gallery

    Okay to the recipe….

    Baked Chocolate and Vanilla Pear tart

    A baked shortcrust pastry tart filled with a milk chocolate ganache and pears spiced with fresh vanilla.

    Pastry

    • 400 g plain flour
    • 200 g unsalted butter (at room temperature)
    • ½ teasp baking powder
    • ½ teasp salt
    • 125 ml milk

    Filling

    • 4 each Pears
    • 360 g Milk chocolate
    • 250 ml Thickened cream
    • ¼ teasp Vanilla paste
    • 20 g sugar

    Pastry Base

    1. Combine the flour, salt, baking powder and butter. 'Rub in' the butter to the flour until the mixture resembles breadcrumbs.

    2. Add the milk and bring the mixture together to form a soft dough.

    3. On a lightly floured surface, gently knead the dough, then roll out to form a circle slightly larger than the flan dish.

    4. Using a little extra butter, evenly grease the inside of the flan dish, ensuring to cover the sides and base.

    5. Set oven to [wprm-temperature value=”180″ unit=”C”]

    6. Place pastry into the dish and adjust to fit. Make sure to get into the edge and all the way to the top all around.


    7. Trim to fit, then gently prick the base part way through all over.

    8. Line the pastry with two sheets of greaseproof placing pie weights on top.


    9. Bake for 15 minutes, then remove pie weights and greaseproof.

    10. Bake for a further 10 minutes then remove from the oven and allow to cool in the dish.

    Filling – Pears

    1. While the pastry is cooking and cooling, peel, quarter and core four pears. place the pieces in a small pan.


    2. Add the vanilla paste and sugar, then cover with just enough water so the pear is submerged.

    3. Place the pan on a low heat and simmer until pears are soft, about 5 minutes only. Do not allow to boil or overcook, nor allow to boil dry.

    4. Allow the pears to cool in the cooking syrup.

    Filling – Chococlate

    1. Break the chocolate into small pieces so they will melt easier.

    2. Warm the cream gently in a small pan. Then remove from the heat.


    3. Stir in the chocolate to the cream until melted.

    Bake

    1. Adjust oven to [wprm-temperature value=”160″ unit=”C”]

    2. Place the cool pears on the cooled pastry, pour the chocolate all around.


    3. Tap the dish to remove any trapped air around the pears.

    4. Bake 25 mins and allow to cool in the dish completely.


    Try adding three or four cardamon pods to the poaching liquid of the pears for a great flavour twist.

    Dessert
    American, Australian, Classic, French, Indulgent, Modern
    bake, Chocolate, Pear, vanilla