
This recipe is our family’s interpretation of the Australian and New Zealand classic biscuit.
ANZAC
The origins of the ANZAC biscuit and even the name are all well documented and I shall only briefly repeat them here. It should be noted that the names ‘ANZAC‘ and ‘ANZAC biscuit‘ are protected in both Australian and New Zealand law. The more detailed history of the biscuit, how it was named, where it came from and even the discussion of whether it is to be soft or hard can all be found online.
ANZAC stands for the Australian and New Zealand Army Corps, founded in 1914 as part of the First World War. The biscuit itself was one that could be fairly easily made by wives or loved ones from pantry staples, and arrive still edible to the serving troops after the long sea voyage to Europe.
More than a century later, these biscuits are still made regularly at homes across Australia and New Zealand and especially to honour the 25th April ANZAC Day Memorial to servicemen and servicewomen from all wars and conflicts since.

Recipe Notes
As I mention, ANZAC Biscuits are protected, and the recipes are very limited in variation while remaining to the original. Below are a few notes to help you when making these.
One common variation is the use of self-raising flour. This can be switched to plain, for a firmer biscuit but I am assured that the slightly lighter option is generally preferred.
I would not recommend swapping the golden syrup for say honey, maple syrup, treacle or molasses. While as a baked item it would possibly work, the taste will be different and it will most certainly not be a true ANZAC. If you can not find golden syrup in your regular store, check an Anglophile type store selling goods from the UK or Australia. It is certainly worth the effort, and you might get a few other tasty goodies while you are there.
The oats should really be Rolled oats, the other types available such as steel-cut or quick oats may work, but just as with the golden syrup, changing will give a different taste and feel.
The crisp or soft debate of the ANZAC biscuit is solved simply; The biscuits should be crisp, or they will not survive the sea voyage. However, in our house, our kids and visitors prefer the softer chewier biscuits to crisp ones, also they barely travel further than the living room. For the proper crisper bake, just leave them in the oven for 2 to 3 minutes more than the recipe below says, mindful that they do not darken too much.
As for size, you may wish to make smaller ones, we often do, for lunch boxes or to give to smaller children. Simply make half-size balls of dough, and bake for about 10 to 12 minutes instead. This will give a yield of up from 24 to 48 biscuits.
ANZAC Biscuits

A sweet buttery biscuit of rolled oats and golden syrup,
- Measuring Cups/Spoons
- Mixing bowl
- Flour sifter
- wooden spoon
- Small saucepan
- Baking Tray
- Silicone baking mat
- 1 Cup Rolled Oats
- ½ Cup Plain Flour
- ½ Cup Self Raising Flour (Can be swapped for plain for a harder biscuit)
- 1 Cup Brown sugar (Firmly packed)
- ½ Cup Desiccated Coconut
- ½ Cup Butter
- 2½ Tblsp Golden Syrup
- 3 Tblsp Water
- ½ Teasp Bicarbonate of Soda
Preheat the oven to 160°Celsius, 320°Fahrenheit, Gas 2-3, Moderate to Slow
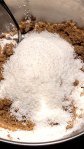
Sift the two flours into the mixing bowl, add the rolled oats, sugar and coconut, Stir to combine and remove any lumps from the sugar.
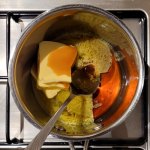
Place the butter in the pan with the golden syrup and water, place on low heat and stir continually until the butter melts.
Stir the bicarbonate of soda into the liquid and mix well to allow it to react
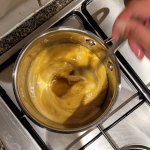
While still foaming pour the warm syrup mixture into the dry ingredients and mix thoroughly to combine into a dough.

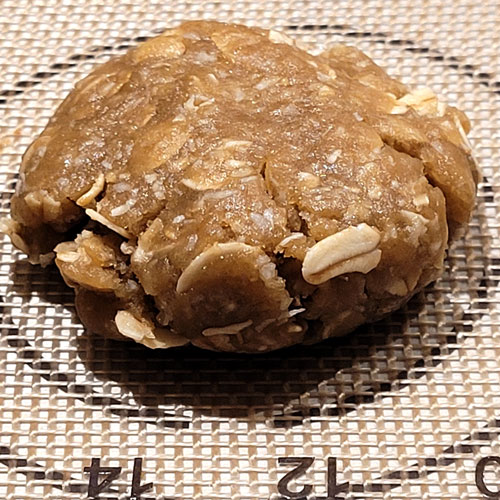
Take a tablespoon piece of dough and roll it into a ball, then press it onto the baking tray lined with either baking paper or the baking mats.

Repeat with the remaining dough, allowing a 2cm space around each biscuit. Aim for 12 on each tray.

Bake one tray at a time for 15 minutes until golden in colour and feel firm.

Allow them to cool directly on the tray for about 15 minutes.
Can be stored in an airtight container away from bright light for several weeks, but I doubt that you will be able to resist for that long.
Can be stored in an airtight container at room temperature for over 2 weeks.

These looks tasty!
LikeLike
Please try them, they really are
LikeLike