Cinnamon rolls

What’s in a name

Firstly, are they cinnamon rolls, scrolls, buns, ‘snails’ swirls, buns or what?

For the purposes of this recipe, I have gone with ‘rolls’ but I do not think there is really a correct or incorrect name. The UK has several names for bread rolls and can be confusing from region to region. There is a great infographic here and that is before we then add the myriad of names from other countries.

I had a similar issue with names when I wrote the Sheperd’s pie post last year. You are welcome to read that in a new tab here.

  • Cinnamon rolls
  • Cinnamon Roll

Recipe Notes

Storage

Like any bread, this is best stored wrapped up at room temperature and eaten within a few days. The cream cheese will need to be refrigerated.

I have never tried freezing them as they never survive long enough, my family devours them way too fast.

Variations

This is a base recipe that I have used for years, amended during covid lockdowns for sour-dough, and amended back again when my starter was not playing nice. I have even expanded the yield from 12 to over 100 rolls when I was making these to sell.

I have done many other variations over the years too, some listed at the bottom of the recipe. If you try any of the suggestions or have other ideas please let me know in the comments.
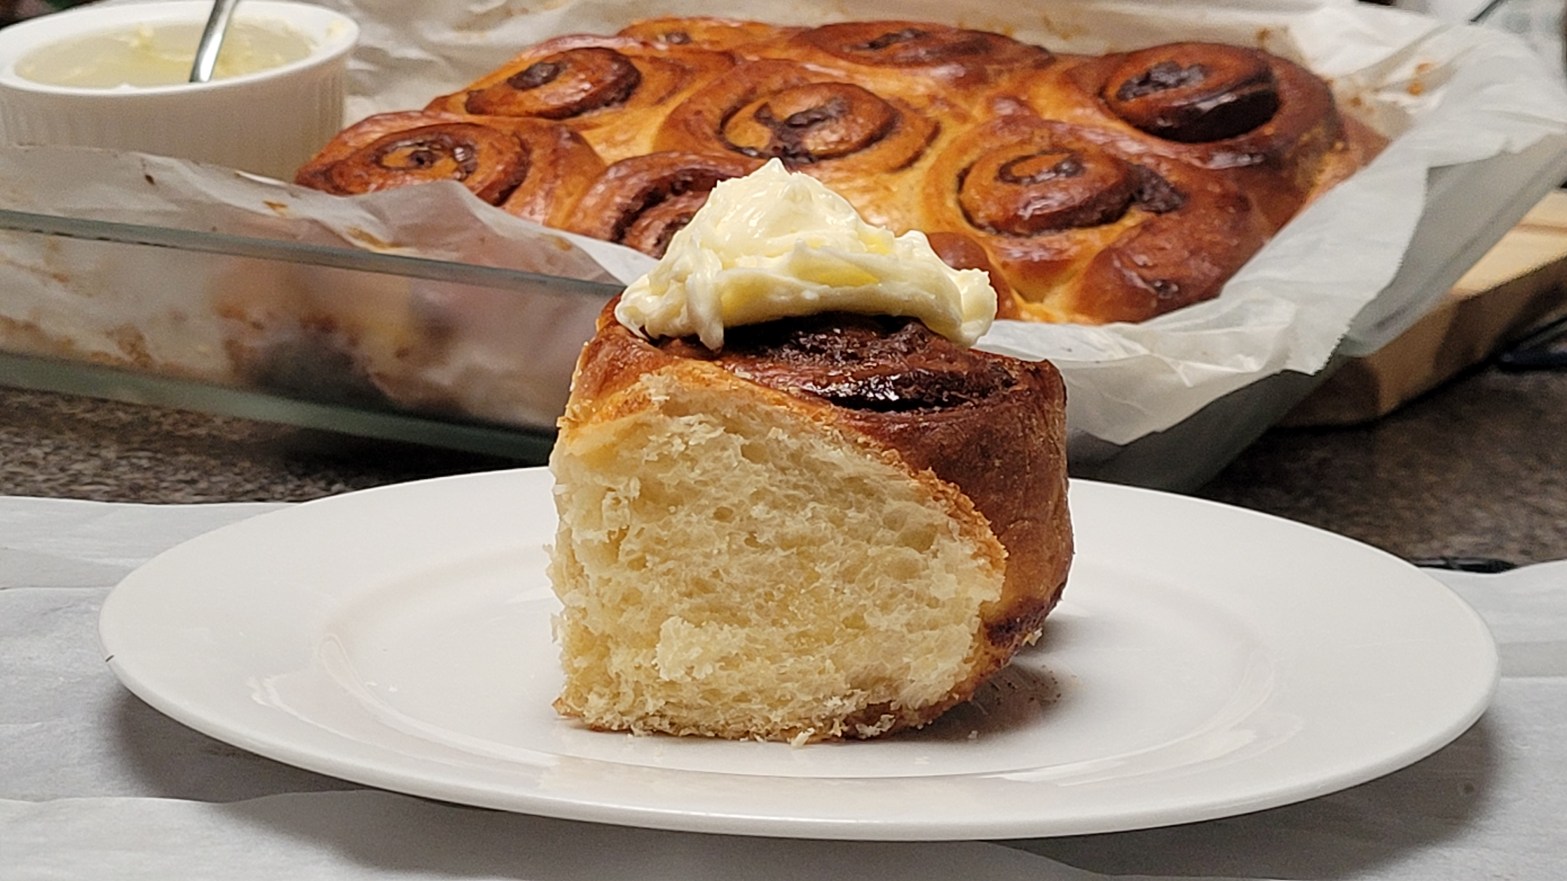
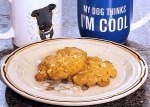
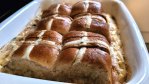
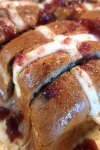
Cinnamon Rolls

Baked Cinnamon rolls with cream cheese frosting

  • set of metric scales
  • small bowl
  • Stand mixer
  • Deep baking dish
  • Scraper / spatula
  • Pastry brush
  • wooden spoon
  • Can of Spray oil

Ingredients

For the Dough

  • 550 g Bread Flour
  • 175 ml Milk
  • 7 g Dried yeast (one sachet)
  • 100 g Unsalted Butter
  • 50 g Caster Sugar
  • 2 each Eggs
  • 2 each Egg yolks
  • 5 g Salt

For the Filling

  • 100 g Brown Sugar
  • 20 g Ground Cinnamon
  • 30 g Unsalted Butter (Melted)

Topping

  • 1 each Egg
  • 50 g Caster Sugar
  • 75 ml Boiling Water
  • 250 g Cream Cheese
  • 100 g Icing Sugar / Confectioners’ Sugar
  • 1 each Lemon (zest and juice (optional))
  1. Combine the milk, sugar and yeast in the small bowl. Allow the yeast to activate for about 10 minutes.

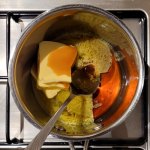
  2. Warm the butter to just start to melt. it should be warm but not hot, if it feels hot to touch, allow to cool before continuing or it will kill the yeast.

  3. Combine the flour and milk mix into the mixer, then add the butter mixture. Add the eggs, egg yolks, and salt to mix and on a slow speed using the dough hook attachment bring together to form a dough. Mix for about 5 minutes until dough is uniform. It should be a little tacky still but not sticky or dry.

    If you prefer to mix by hand, be aware this is a very sticky and oily dough with a high moisture content similar to ciabatta. Once you start you will not be able to pause and it will take longer than the 5 minutes on the mixer.

  4. Place dough into a clean bowl, and cover with oiled plastic wrap to prevent evaporation and a ‘skin’ forming. Allow to prove for 2 hours at room temp.

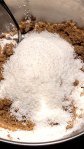
  5. Mix the brown sugar and cinnamon, any clumps or lumps in the sugar should be broken up.

  6. Prepare your baking dish, by lining with baking paper and then lightly oiling using spray oil.

  7. Once dough has doubled, place on a lightly floured surface and stretch into a rectangle 60cm (24 inches) on the long side and 30 cm (12 inches) along the short side.

    Do not roll as this will remove the gas bubbles.

  8. Brush the top of dough liberally with the melted butter, then spread the sugar and cinnamon mix out evenly on top. Leave a small gap about 2 cm on the long edge furthest away from you.

  9. Gently roll up the dough from the long edge closest to you, being careful not to squash, or roll too tightly. Any cinnamon mix that falls out as you roll should be collected as will be used in a moment.

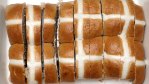
  10. Using a serrated knife, and without pressing the roll, cut into 5 cm thick/long pieces to give 12 rolls. Or cut 4 cm to give slightly smaller rolls but 15 in total.

  11. Scatter the spilled cinnamon sugar from the previous step into the lined dish, then evenly space the rolls on top, leaving a gap all around so they can expand. Cover as before and allow to prove for 2 hours at room temperature.

Baking

  1. Set your oven to [wprm-temperature value=”180″ unit=”C” help=”Use "Fan forced" if available”]

  2. Uncover the rolls and brush with beaten egg. You will not need all of the egg, but ensure they are well covered.

  3. Bake for approximately 25 minutes. I like to turn the tray around after about 15 minutes as this will help with uniform rising and browning of the rolls.

  4. A few minutes before they are due to be removed, combine the boiling water and sugar to form a syrup, and have to one side. The water must be boiling to dissolve as much of the sugar as possible. A few loose grains are not an issue.

  5. Remove from the oven when evenly browned and immediately pour the syrup gently all over the whole tray of rolls and allow to soak in for at least 15 minutes.

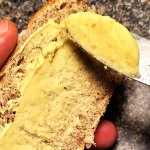
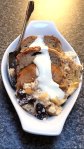
Cream cheese topping

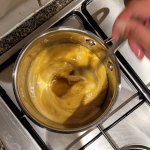
  1. Place the cream cheese, sugar and optional lemon in a bowl, Beat well to soften and ensure well combined.

  2. Serve the warm roll with a spoonful of the cream on top.

Variations and options

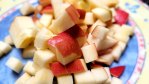
  • If you like apple pie, you can grate a cooking apple and add this to the cinnamon sugar mix before spreading on the dough.
  • Lovers of nuts can add chopped toasted pecans, almonds or walnuts to the cinnamon sugar mix.
  • For a Christmas or Halloweeen twist try my Pumpkin spice mix instead of cinnamon.
  • Maple Syrup is a great alternative to the sugar syrup poured on at the end of baking, use about 75 to 100 ml and ensure to warm it first.
  • If serving as a buffet item, Rather than adding the cream to each bun, you can allow them to cool completely, turn over to present the flat side and evenly spread the cream over. 
Breakfast, Dessert, Snack
American, Australian, British, Christmas, Classic, Indulgent, Traditional
bake, bread, Cinnamon, cream cheese, dessert, frosting, Hot Cross Bun, roll, scroll, sweet

Vanilla Marshmallows

My kids love marshmallows, as do I, so I decided to make some. The first time was a few years ago and now I make these quite regularly.

I have experimented with colours and flavours with mixed success. The plain white vanilla still appear to be the favourite.

Hope you enjoy them too.

Vanilla Marshmallows

Fluffly

  • Stand mixer
  • Small saucepan
  • 20cm x 20cm deep baking pan
  • Scraper / spatula
  • Thermometer
  • large bowl
  • Sieve
  • Large storage jar

Marshmallow base

  • 500 g Sugar
  • 25 g Powdered gelatine
  • 200 ml Water
  • 10 ml Natural Vanilla Extract
  • 5 g Salt
  • Pink food colouring
  • Spray veg oil

Dusting powder

  • 65 g Icing Sugar
  • 30 g Corn Flour
  1. Combine the gelatine and 100ml of the water in the mixer and allow to 'bloom'

  2. Combine the sugar and remaining water in the pan and let the sugar absorb the water.

  3. Place the pan on a low heat, with the thermometer added. Do not stir and allow to come to a rolling boil. Have the bowl of cold/iced water to hand for safety – see notes

  4. The temperature for the sugar is [wprm-temperature value=”120″ unit=”C” icon=”temperature”] or 'Firm ball" stage. Once at this stage remove from the heat immediately.

  5. Turn the mixer onto a slow to medium setting and gently pour the hot syrup in a fine stream down the side of the bowl. This may require both hands as can take a few minutes to pour. but do not pour too slowly or the sugar and the mix will cool down and make tough hard marshmallows.

  6. Once all syrup is poured in, add the salt and vanilla and turn the mixer to a medium-high setting for 3 to 5 minutes. The volume will increase to around 3 times and fill the mixing bowl.

  7. Using the spray oil, coat the scraper and baking pan we.

  8. If you wish to colour the marshmallow, add a few drops and mix briefly, repeat until the desired colour is achieved.

  9. Pour the marshmallow into the prepared baking pan, and even out with the scraper.

  10. Combine the icing sugar and cornflour in a sieve to remove any lumps and lightly cover the top of the marshmallow. The remaining sugar mix should be stored in a small airtight container for later.

  11. Wrap marshmallow in cling film or place in a suitable large airtight container and allow to stand for at least 6 and preferably 24 hours to set.

  12. Tip the marshmallow onto a suitable cutting surface and using an oiled sharp knife slice into small squares.

  13. Dust the squares with the icing sugar mix reserved from earlier, and place in the storage jar. sprinkle more icing mix if desired before putting the lid on for safe keeping.

Dessert, Snack
American, Australian, British, Christmas, Classic, French, Indulgent
marshmallow, marshmallows

How to make the most incredible Cinnamon French Toast Waffles

In the morning decisions can be hard, waffles? French toast? but I want Cinnamon and not a heap of washing up. Well here is the solution to that breakfast dilema; Cinnamon French Toast Waffles !

A couple of years ago I came across the idea of cooking French toast, or “Eggy bread” as it is known in the UK, with a waffle iron. It’s a really old idea and has been done many times and in many ways before or since. Be warned that once you try it you will be making it more often than you might dare admit.

The video link within the recipe is to a YouTube video from my channel, which shows the method in just a couple of minutes.

The recipe is fairly basic, and you are welcome to interpret it how you wish. We love these with ice-cream and maple syrup, whipped sweetened cream cheese, simply buttered, or as part of a much larger breakfast feast with bacon, sausages, beans, mushrooms, hashbrowns, tomato, spinach, avocado, eggs etc, just please invite me if you do this.

For this recipe, and as you can see in the video, I have used a square waffle iron that takes two slices of bread at a time. If your waffle iron is larger and takes four all the better. However, if you have a small round waffle iron, you may have to cook just one slice at a time, or even cut to size before dipping into the egg.

Cinnamon French Toast Waffles

How to make the most incredible Cinnamon French Toast Waffles

  • Waffle iron
  • small bowl
  • fork
  • 4 each eggs
  • 8 slices bread
  • 2 tblsp cinnamon
  • 1 each spray veg oil (only a squirt!)
  1. Turn on the Waffle iron and allow it to come to cooking temperature

  2. Lightly spray the iron with the veg oil

  3. Crack the eggs in the bowl, add the cinnamon and whisk with the fork to combine.

  4. Dip one slice of bread at a time and place in the waffle iron.

  5. Cook until preferred doneness.

  6. Serve with a combination of ice-cream, maple syrup, fresh fruit, bacon, or all of these.

Breakfast
American, Australian, Fusion, Indulgent, Modern
Cinnamon, Eggy bread, French Toast, Waffles

Vanilla Cheesecakes with Ginger Biscuit Crumb Base

When I was a kid I started making a ‘no-bake cheesecake’ and have been playing with the recipe ever since.

This is a great cheesecake canvas which you can then add to with lemon or caramel or blueberries or all the other great cheesecake flavours and really make it your own.

I also prefer to use Ginger biscuits with a plain cheesecake, as it pairs well with the light, sweet flavour of the vanilla and slightly salty cream cheese. While you can use store-bought no problem, if you want to make this completely from scratch there is a recipe for my favourite ginger biscuits here on the blog.

For this recipe, I decided to make this as 12 individual cakes, but you could easily make it into a single cake. I would suggest a 20cm/8inch springform and line the bottom with greaseproof to make it easier to remove and serve.

Here is my Instagram reel showing some of the pictures I took and the process to make this dessert.

Individual Vanilla Cheesecakes with Ginger Biscuit Crumb base

A dozen Individual vanilla cheesecakes with a crisp ginger biscuit crumb base. This is a no-bake recipe that is also vegetarian friendly.

  • Food processor
  • Stand mixer
  • 12 hole muffin tray
  • paper / foil cupcake cases
  • pastry scraper
  • Sieve
  • Piping bag

Biscuit base

  • 250 g Ginger biscuits
  • 100 g Unsalted butter

Topping

  • 375 g Cream Cheese
  • 250 ml Thickened cream
  • 125 g Icing sugar
  • 5 g Vanilla caviar

The biscuit bases

  1. Crush the biscuits, by dropping into the food processor as it is running. This will ensure the biscuits are evenly crushed and the machine is not overloaded.

  2. Melt the butter. Then with the processor still running, drizzle the butter slowly in through the top until all combined.

  3. To each cupcake case add 29g of the base mix.

    If you are amending the recipe size, ensure to divide the total weight of the base mix by how many cases you are making. It should remain about the same.

  4. Place the cupcake case in the muffin tray and gently press the cheesecake base down with your fingers. This is to create a flat base and using your fingers will not make it too compressed and therefore too hard.

  5. Chill the bases for at least 30 minutes.

Cheesecake top

  1. Place the cream cheese in the bowl of the mixer and use the whisk attachment on low break up and soften.

  2. Sieve the icing sugar and reserve to one side.

  3. While the mixer is running, slowly pour the cream into the bowl until just combined.

  4. Stop the machine, add the vanilla and about half the icing sugar, start the machine on low and allow to combine.

    Repeat with the remaining sugar.

  5. Once sugar is all combined, turn up your mixer speed to around medium-high for a couple of minutes to have the mix aerate and thicken.

    The aim is to have it at a light but thick enough to be firm piping consistency, being mindful not to overbeat.

Completing the dessert

  1. Remove the bases from the refrigerator and fill with the cheesecake mix to the rim of the case, either with a couple of spoons to scrape from one to the other, or using the optional piping bag.

  2. To achieve a flat top, place a tablespoon or palette knife in hot water and use it to smooth the top, returning to the water if the mix begins to stick to the spoon or knife.

  3. Refrigerate for an hour to allow them to fully firm up.

Dessert
American, Australian, British, Classic, French, Indulgent
cheese cake, cheesecake, ginger, natural vanilla, no bake, vanilla, vegetarian

Quick Bougatsa

Those that know me, know I love sweet custardy, creamy, milky desserts. I love pastry with crunch and I am a sucker for anything I can pour maple syrup on.

So when I saw several posts on Instagram showing things like clafoutis, or bougatsa, my brain started ticking over. I sort of followed the general direction of these posts but ultimately I made this up as I went and it worked.

Below is my Instagram reel showing the method in just 90 seconds, and shows the important ” Concertina fold” that makes this dish work so well.

Thanks go to Nina from Natural Vanilla in Perth, for helping this taste so so good.

Quick Bougasta

A quick and easy version of this classic Greek dessert,

  • Deep baking dish
  • Mixing bowl
  • Whisk
  • Pastry brush
  • Small saucepan
  • Sieve

Filo

  • 10 sheets Filo pastry (Approx half a pack)
  • 100 g unsalted butter

Filling

  • 1 can Sweetened Condensed Milk
  • 2 each Eggs
  • 100 ml Milk
  • 1 each Orange (zest only)
  • 5 ml Vanilla paste

To finish

  • 2 tbsp Icing Sugar / Confectioners’ Sugar
  • 3 tbsp Maple Syrup
  1. Turn on your oven to 180° Celcius 360° Fahrenheit Gas 4 Moderate to Medium, or as per the baking directions of the filo packet.

  2. Melt the butter in the pan and liberally brush the baking tray.

  3. Lay out the filo and brush the top one lightly with butter. Then gather it up in a 'concertina style' fold and place it at the end of the baking tray. Repeat with the remaining filo. Ensure that the tray is filled, but that the filo is not too tightly packed.

  4. Brush any remaining butter over the top of the filo and then bake for 15 minutes until just begins to turn golden.

Filling

  1. Combine the filling ingredients in the mixing bowl and lightly whisk to combine.

  2. Remove the baking tray when lightly coloured as per above and while still hot, pour the filling mixture evenly over the tray.

  3. Give the tray a light shake to help distribute the filling and return to the oven.

  4. Bake for 25 – 30 minutes or until golden and the filling is set.

  5. Once done, remove from the oven and immediately cut into 12 pieces.

  6. Use the sieve to dust with half of the icing sugar and when plating dust more icing and a drizzle of maple syrup

Breakfast, Dessert
Australian, Greek, Indulgent, Modern, Traditional
bake, butter, egg, filo, Greek, natural vanilla, vanilla, vegetarian

How to make vertical format video in Adobe Premiere Elements

I have struggled for a long time to get vertical format video in Premiere Elements, so I can edit.

As all of us now record and play vids on our phones, to then make Instagram reels, Facebook, Youtube, Tictoc or whatever, this will really help up my game and maybe yours too.

Note that I am in no way associated with the maker of this vid, but Ish, the creator, tells you in clear steps how to do it and I am very grateful I found it !

Slow Braised Corned Beef with Cranberries

This is one of those great “slow food” recipes that can be done in either a slow cooker, the home oven, or as I did in a wood-burning pizza oven. The time taken allows the otherwise tough meat to render off the fat, soften the tissue, and absorb all the flavours from the spices and vegetables added.

The Beef

What is Corned Beef? Historically, it used to be a Beef Brisket or though in modern times it is mainly Beef Silverside, these being two of the toughest cuts of meat you could ever want to cook. These would have been packed in barrels of a dry mixture of salt, herbs, spices and salt-nitrates. The latter was in the form of large grains that looked like corn grains, hence the ‘corned’ in the name.

While this dry salting may still be done by some butchers, our desires for a lower sodium diet meant the brining is now done in a bath of water with the aromatics and flavourings, less salt and nitrates all in a cold water bath. This is why corned beef is now usually now sold in a bag with liquid inside. This liquid is red not from blood but the salt nitrates, which also turn the meat that rich pink colour.

The soaking – debrining

Even with the lower salt methods of modern preparation, a store-bought corned beef joint is usually very high in sodium. This can be a problem, not only for those with blood pressure issues or those on low sodium diets, it can also overpower any other flavours we wish to introduce.

To this end, we need to dissolve the salt out of the joint. In the recipe, you will see that the first two steps are specifically about this process. Once removed from the packet, lightly rinse the joint in cold running water to remove the nitrate solution from the surface. Then soaking in a bath of clean cold water for a few hours will allow more of the solution to be removed.

I like to do this de-debrining twice, as the side the meat rests on does not get a chance to release its salt and the water will only take in so much. So changing the water and flipping the meat over after a few hours will really help.

I list the de-brining as a 3-hour process change and repeat. However, if you can allow the second de-brine to be longer, possibly up to a full 24-hour cycle, all the better.

Cooking the beef in the oven

As you are probably aware, I own a small wood-fired pizza oven, which holds its heat quite well once the pizzas are all cooked and finished. I feel it is a waste of fuel to allow it to just continue to burn and cool down over the evening without something else being in there to enjoy that deep radiant and convective heat, plus the added smell of the smoke if I add some hickory chips.

But do not worry if you do not own a pizza oven, as this recipe works equally in a conventional oven.

Can I use my slow cooker?

Absolutely! timings will be longer for the cooking, but you do not need to worry about the falling temperature, just set it to “low” and see you in 8 hours.

Slow Braised Corned beef infused with Cranberries

Traditional corned beef, slow braised in a stock flavoured in cranberry juice with extra cranberries

  • 1.5 kg Corned Beef
  • 1 each Carrot
  • 1 each Leek
  • 4 cloves Garlic ( )
  • 1 bunch Fresh Thyme
  • 2 Tblsp Olive Oil
  • 1 Tblsp Sweet Paprika
  • 1 Tblsp Ground Cumin
  • 1 each Star Anise
  • ½ teasp Chilli Flakes
  • 50 g Dried Cranberries (for cooking pot)
  • 250 ml Cranberry Juice
  • 25 g Dried Cranberries (for sauce)

Debrining the Beef

  1. Remove the meat from any packaging, rinse gently with cold water and place in a large container, cover with cold water and place in the refrigerator for 3 hours.

  2. Discard the water, turn the meat over and cover with fresh cold water. Return to the refrigerator for at least 3 more hours.

    This step can be done overnight.

Cooking the Beef

  1. Remove the dark green section of the leek, split lengthways and then slice into small pieces roughly 1 cm square.

    Rinse well to remove any grit or dirt hidden between the leaves.

  2. Coarsely chop the carrot, peel the garlic and coarsely chop too. Combine the carrot and leek with the spices, oil and washed leek in an ovenproof cooking pot.


  3. Remove the beef from the refrigerator and add to the pot, discard the water it was soaking in.


  4. Scatter the dried cranberries over the meat, pour over the cranberry juice and top the pan up with fresh cold water until the meat is covered.


  5. Place a well-fitted lid on the pot and put it into a hot oven 200°C 400°F Gas Mark 6

  6. This is cooked in a 'falling oven' Every 30 minutes reduce the temperature of the oven by 20-30°C until you are at 120°C (250°F, Gas ½) for 30 minutes

    Note I cook mine in a wood-fired oven and allow the logs to slowly burn down, topping with a little charcoal midway if needed.


  7. After 3 hours of cooking the meat should be ready. Remove the pan from the oven and gently lift the beef onto a plate or board for carving. and cover to allow to rest for at least 20 minutes.


  8. Pour all the liquid through a fine sieve, pushing the contents through into a small pan. Add the dried cranberries and bring it to a low boil to allow to reduce and thicken naturally.

  9. Carve the meat carefully, as it may want to break up, and serve with the sauce.


Main Course
American, Australian, British, Classic, Irish, Jewish, Traditional
beef, braised, corned beef, Cranberries, Cranberry, slow braised, slow food

ANZAC Biscuits

This recipe is our family’s interpretation of the Australian and New Zealand classic biscuit.

ANZAC

The origins of the ANZAC biscuit and even the name are all well documented and I shall only briefly repeat them here. It should be noted that the names ‘ANZAC‘ and ‘ANZAC biscuit‘ are protected in both Australian and New Zealand law. The more detailed history of the biscuit, how it was named, where it came from and even the discussion of whether it is to be soft or hard can all be found online.

ANZAC stands for the Australian and New Zealand Army Corps, founded in 1914 as part of the First World War. The biscuit itself was one that could be fairly easily made by wives or loved ones from pantry staples, and arrive still edible to the serving troops after the long sea voyage to Europe.

More than a century later, these biscuits are still made regularly at homes across Australia and New Zealand and especially to honour the 25th April ANZAC Day Memorial to servicemen and servicewomen from all wars and conflicts since.

ANZAC Biscuits ready for the oven

Recipe Notes

As I mention, ANZAC Biscuits are protected, and the recipes are very limited in variation while remaining to the original. Below are a few notes to help you when making these.

One common variation is the use of self-raising flour. This can be switched to plain, for a firmer biscuit but I am assured that the slightly lighter option is generally preferred.

I would not recommend swapping the golden syrup for say honey, maple syrup, treacle or molasses. While as a baked item it would possibly work, the taste will be different and it will most certainly not be a true ANZAC. If you can not find golden syrup in your regular store, check an Anglophile type store selling goods from the UK or Australia. It is certainly worth the effort, and you might get a few other tasty goodies while you are there.

The oats should really be Rolled oats, the other types available such as steel-cut or quick oats may work, but just as with the golden syrup, changing will give a different taste and feel.

ANZAC Biscuit ready for the oven

The crisp or soft debate of the ANZAC biscuit is solved simply; The biscuits should be crisp, or they will not survive the sea voyage. However, in our house, our kids and visitors prefer the softer chewier biscuits to crisp ones, also they barely travel further than the living room. For the proper crisper bake, just leave them in the oven for 2 to 3 minutes more than the recipe below says, mindful that they do not darken too much.

As for size, you may wish to make smaller ones, we often do, for lunch boxes or to give to smaller children. Simply make half-size balls of dough, and bake for about 10 to 12 minutes instead. This will give a yield of up from 24 to 48 biscuits.

ANZAC Biscuits

A sweet buttery biscuit of rolled oats and golden syrup,

  • Measuring Cups/Spoons
  • Mixing bowl
  • Flour sifter
  • wooden spoon
  • Small saucepan
  • Baking Tray
  • Silicone baking mat
  • 1 Cup Rolled Oats
  • ½ Cup Plain Flour
  • ½ Cup Self Raising Flour (Can be swapped for plain for a harder biscuit)
  • 1 Cup Brown sugar (Firmly packed)
  • ½ Cup Desiccated Coconut
  • ½ Cup Butter
  • 2½ Tblsp Golden Syrup
  • 3 Tblsp Water
  • ½ Teasp Bicarbonate of Soda
  1. Preheat the oven to 160°Celsius, 320°Fahrenheit, Gas 2-3, Moderate to Slow

  2. Sift the two flours into the mixing bowl, add the rolled oats, sugar and coconut, Stir to combine and remove any lumps from the sugar.


  3. Place the butter in the pan with the golden syrup and water, place on low heat and stir continually until the butter melts.


  4. Stir the bicarbonate of soda into the liquid and mix well to allow it to react


  5. While still foaming pour the warm syrup mixture into the dry ingredients and mix thoroughly to combine into a dough.


  6. Take a tablespoon piece of dough and roll it into a ball, then press it onto the baking tray lined with either baking paper or the baking mats.


  7. Repeat with the remaining dough, allowing a 2cm space around each biscuit. Aim for 12 on each tray.


  8. Bake one tray at a time for 15 minutes until golden in colour and feel firm.


  9. Allow them to cool directly on the tray for about 15 minutes.

  10. Can be stored in an airtight container away from bright light for several weeks, but I doubt that you will be able to resist for that long.


Can be stored in an airtight container at room temperature for over 2 weeks.

Biscuits, Dessert, Snack
Australian, Classic
ANZAC, bake, Biscuit, Biscuits, butter, golden syrup, traditional

Cranberry and Apple Hot Cross Bun Pudding

Hot Cross buns are a wonderful thing, spiced with cinnamon, nutmeg and other things, packed with dried fruit and a treat like Christmas cake available only for a short time around Easter. Or at least that is how it used to be.

The history of the buns is strongly linked to celebrations relating to Easter. Various European countries make a spiced bread bun to celebrate Spring rebirth and the cross on top clearly references the Christian crucifixion.

The use of spices in historical times was limited due to their difficulty to import from far off lands, making them a rare and expensive luxury. So it was that they would in turn only be used for special occasions or special dishes.

There is also the decree from the time of Queen Elizabeth and 16th Century England, that stated it was forbidden to bake or sell hot cross buns or other spiced bread, except on the day of burials, Good Friday or Christmas. The fine for doing so was that they would be confiscated and donated to the poor. I wonder how many were donated or were instead ‘sampled’ by those confiscating.

Now in modern times such a law no longer applies, and the sweet buns seem to appear on the shelves before Santa has even finished deliveries. Not just ‘traditional’ fruit and spice either, but fruitless, chocolate, coffee, and I have even seen tropical and caramel.

Well,” I thought “rather than complain, let’s embrace this glut of yum and bake something.” And after a few tries to get it right, I have come up with the following recipe.

Note that for the recipe, I have suggested fruitless, as it allows the cranberry and apple flavours to shine through. If you want to make this with one of the other flavours, go right ahead, there are no rules only guidelines.

Also, we were ‘naughty’ and had ours with extra cream, just because we could.

Cranberry and Apple Hot Cross Bun Pudding

Making use of the proliferation of Hot Cross buns in the supermarket, to reimagine a timeless classic

  • Mixing bowl
  • deep baking tray
  • bread knife
  • Sieve
  • 1 6 pack Pre-made Hot Cross Buns (Fruitless works best for this)
  • 50 g Butter (at room temp)
  • 1 each Red Apple
  • 100 g Dried Cranberries
  • 500 ml Milk
  • 200 ml Thickened Cream
  • 3 each Eggs
  • 100 g Caster Sugar
  • ½ teasp Cinnamon (approx, for dusting)

Glaze

  • 1 tbsp Cranberry Sauce
  • 1 tbsp Caster Sugar
  • 2 tbsp Boiling Water
  1. Dice the apple and scatter with the cranvberries evenly over the baking tray


  2. Remove the buns from their pack and slice vertically into 1 cm thick slices.


  3. Spread butter on both sides of each slice, including the ends, and place on top of the fruit in the tray.


  4. Combine the milk, cream, eggs and sugar in the bowl, stir well, then strain through the sieve over the buns. Ensure to pour the milk mixture evenly over all the buns to cover.

  5. Dust with the cinnamon, and then place in the refrigerator for a minimum of 2 hours to allow the milk to be absorbed. If you can leave overnight even better.

  6. Preheat your oven to 160°C 325°F, Gas mark 3, Warm

    Remove the tray from the refrigerator and bring to room temp while the oven warms.

  7. Bake in the middle of your oven for 30 minutes, or until the custard sets. If the top starts to darken too much, cover loosely with foil or baking paper, and turn the oven down slightly.


  8. Just before you are ready to remove the tray from the oven, prepare the glaze by combining the sugar and cranberry sauce then stir in the boiling water. Set to one side.

  9. When the custard is set, remove it from the oven and immediately spoon the glaze over the buns and allowing it to spill in between and around.


  10. This can be served immediately, or allowed to cool at your discretion.


Note nutritional values exclude the buns that are used.

All nutritional values should be taken as a guide only, as ingredients used may vary from samples tested and referenced.  Any concerns regarding your nutrition should always be referred to a qualified medical professional.

Dessert
American, Australian, British, Classic, Easter, Fusion, Indulgent, Modern
Apple, bake, bread and butter pudding, Cranberries, Cranberry, dessert, egg, Hot Cross Bun, pudding

Simple Pizza Dough

A great basic bread dough recipe perfectly suited for pizza making.

Jump to recipe here

Friday in our house has always been pizza and movie night for as long as I can remember. Sometimes it is a takeaway from our fave pizza store with “chicken shop chips” from the charcoal bbq chicken place next door. But if I am home during the day and have the time, then I love to make them from scratch.

Set oven to about 350 degrees Celsius redgum log

Pizza dough is surprisingly easy to make and while it does take a few hours of proving and resting, the actual time you will be actively making and cooking is maybe only half an hour. if you have a food mixer with a dough hook then kneading is no problem.

For years I have baked my pizza in just the regular home oven in the kitchen, only upgrading on my 50th birthday (thank you family) to a wood-fired oven, which takes more work, but makes the best possible pizza. This recipe works in both, just crank up the oven to maximum, and if you can get a pizza stone, which are relatively inexpensive all the better.

Making pizzas in the backyard for my birthday

Kneading

Kneading the dough is a paramount process in all breadmaking. It combines the ingredients evenly, and more importantly activates the gluten in the flour. This gluten protein holds the yeasty gas bubbles to then create the rise in the dough.

There are many techniques for kneading, the easiest is to use a mixer with a dough hook; Fast no effort, and even. However, it is easy to over-knead with a machine that can then break the gluten strands. Hand kneading can be done for mixes up to several kilos, are a great upper body workout, and a better way to get a ‘feel’ for how the dough is forming.

The process is easy enough, push the dough with the heel of your hand from the middle and away from you, while at the same time holding the rest of the dough with the other hand. fold back upon itself, turn and repeat. About five minutes is all that is needed ( no pun intended) for this recipe.

Note: There is also a ‘folding’ technique that can be used, but is really much better for dough mixes too soft to knead, such as those with a higher percentage of water.

“Knocking back”

You may have heard the term when discussing bread making, and it is a simple enough process. It is a short, quick kneading before dividing the dough into separate pieces and the second ‘proving’. But why do we do it?

Once the dough has proved, or rested for a while, the yeast bubbles become large, but not particularly uniform in either size or distribution within the dough. The idea of the ‘knockback’ is to even out these issues, for a better more even final product. As we still don’t want to overdo it, it is usually only a few turns before dividing and forming into balls for the second prove.

Stretching over rolling

When you first start out making your own, you can ‘cheat’ and roll out the dough with a rolling pin, rather than stretching. it is quick, easy, gets the job done, and is a method used by many commercial places. BUT It is not as good for the dough or crust, as it flattens and bursts those tiny bubbles of gas from the yeast. This can result in a tough and disappointing pizza crust.

Stretching is a skill that comes with practice. and one worth learning as once you have it you will find it helps tremendously both with your pizza and with anyone watching you make them as you ‘look professional’.

I am no great expert on stretching pizzas, I don’t make them often enough to call myself that. But I do like doing it. It is something that can look really impressive if you do the famous spin and throw, and yes there is a valid reason for doing that. Generally, the big advantages of stretching over rolling are that the base will cook crispier on the outside while soft in the middle, also it creates that lip edge that will rise when cooking into the gorgeous crust we all love.

If you are brave and want to ‘throw your pizza’ as in toss into the air, have it spin and then catch. Go for it! It does help to make your pizza more regular and round, it also further stretches in a more even manner. But be aware it will also throw flour around your workspace, and in your hair as it spins.

Below is a short video from my YouTube channel on how I do it, I don’t throw this one deliberately to show that there is no great need (knead).

Toppings

We all have our favourite toppings, and those we can not have; anchovies, olives, onion, seafood, hot chillies, sweetcorn, which cheese must be used, how the tomato base should be made or the infamous argument regarding pineapple.

My say on all this is simple, use what you have, and what you like, just don’t stress. Remember that pizza was for centuries a peasant dish made with kitchen scraps on a bit of leftover bread dough. Only when Queen Margarita realised that she and her husband, the King, were losing favour with the common people did she stoop to try, and in turn like a particular Neopolitan baker’s fare. Had he had a tin of pineapple chunks in juice to hand, perhaps there would be less discussion on this.

So in a nutshell, If you want and have it available add it; if you don’t leave it off.

Ingredients

  • 800 g Plain flour (Ideally a bread flour with 10% protein or higher)
  • 480 g Water (Room temp from the tap is fine,)
  • 1 sachet Dried Yeast – usually 7g or about a teaspoon
  • 30 g Olive Oil
  • 10 g Salt
  • 5 g Sugar (Optional if yeast is old, or baking in a regular domestic oven, that can not get to high temperatures
  • Also , 50 g approx. Coarse Semolina or Polenta – used just for dusting the worktop at final stretching

Equipment

  • Can of Spray oil
  • set of metric scales
  • pastry scraper
  • large mixing bowl or stand mixer
  • Pizza oven
  • Ceramic pizza stone
  • Pizza Peel
  • Pizza Cutter, or a good sharp knife

Method

  1. Measure out the water and add the yeast, allow it to dissolve and ‘activate’. Add the sugar if making your pizzas on a cold day, or if using a standard domestic oven. If not bubbling after 15 minutes discard and repeat.
  2. Measure out remaining ingredients and combine with the yeast mix in a large mixing bowl, or in your stand mixer bowl. This will be a very lumpy and sticky mix at first but will come together as you mix and knead.
  3. Knead for about 5 minutes until a smooth dough forms. Be mindful not to over-knead. see notes on kneading or the vide in this post.
  4. Lightly spray the top of the dough and cover with clear plastic wrap. Allow to prove for at least one hour or until doubles in size.
  5. Remove dough from the bowl and “knock back” – which means lightly stretch and knead for a minute to remove the large air bubbles.
  6. Separate the dough into 6 even lumps, roughly 215g each. Roll into balls and place on a lightly oiled tray. Spray the top of the dough and cover for a further hour.
  7. Ensure the oven is preheated to its hottest, around 350 to 400°C is ideal.
  8. Prepare your pizza toppings of choice and have them ready to use. I like to have the sauce in a bottle, and the rest in bowls, just like you see in the pizza store.
  9. Onto the floured surface, place one of the dough balls and begin to shape. Start by flattening with fingertips, then lightly grip and stretch one side as you push away the other side with the side of your hand. Turn the dough slightly and repeat. If you stay away from the edge with either hand you will both stretch the dough and create the all-important edge crust. Just be careful to not overstretch or you will put a hole in your pizza.
  10. Once stretched to the desired size, add your preferred toppings and use the peel to slide into the oven. A truly hot oven will cook the pizza in under 2 minutes! A regular domestic oven only 4 to 5 minutes.
    You may need to turn the pizza as it cooks, so do not walk away, look at phones or be distracted in any other way!
  11. Check the underside is cooked by gently lifting the edge, and remove from the oven using the peel.
  12. Cut into 6 or 8 slices and serve immediately